English
 Deutsch
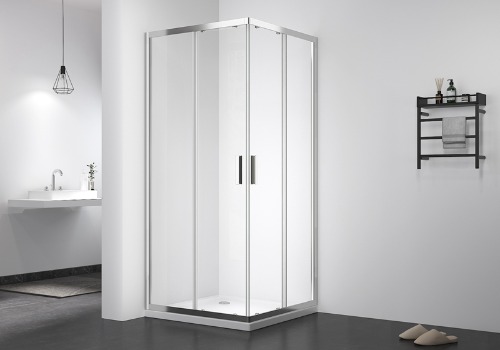
Pivot door shower enclosures, also known as swinging or hinged door shower enclosures, are a popular choice for bathroom shower installations. They feature a door that swings open and closed on a pivot mechanism, providing easy access to the shower area. Here are some common applications and advantages of pivot door shower enclosures:
Space Efficiency: Pivot door shower enclosures are ideal for bathrooms with limited space. Unlike sliding door enclosures that require clearance for the door panels to slide, pivot doors swing inward or outward, taking up less space. This makes them suitable for smaller bathrooms or tight shower areas where a swinging door won't interfere with nearby fixtures or furniture.
Accessibility: Pivot doors offer convenient accessibility to the shower space. The wide opening provided by the swinging door allows for easy entry and exit, accommodating individuals with mobility issues, those who use mobility aids like wheelchairs or walkers, or anyone who prefers a more open and spacious shower experience.
Aesthetics and Design Flexibility: Pivot door shower enclosures are available in a wide range of designs, styles, and finishes to complement various bathroom aesthetics. They can be framed or frameless, with the latter offering a sleek and modern look. The versatility in design options allows homeowners to choose a pivot door enclosure that matches their bathroom décor and personal preferences.
Durability and Stability: Pivot door shower enclosures are known for their durability and stability. The pivot mechanism, often made of metal or high-quality materials, provides reliable operation and long-term performance. Properly installed, the pivot door can withstand regular use and maintain its functionality over time.
Easy Maintenance: Pivot door shower enclosures are generally easy to clean and maintain. The swinging door allows for better access to the shower area, making it convenient to clean both the door and the enclosure. Additionally, the absence of tracks or rollers, which are found in sliding door enclosures, reduces the chances of debris buildup and makes maintenance simpler.
It's worth noting that the suitability of a pivot door shower enclosure depends on the specific bathroom layout and the preferences of the homeowner. Factors such as available space, bathroom design, and accessibility requirements should be considered when choosing the type of shower enclosure. Consulting with a professional or a bathroom design specialist can help ensure that a pivot door shower enclosure is the right choice for your specific needs and bathroom layout.Meanwhile,Installing a pivot door shower enclosure typically involves several steps to ensure proper fit, alignment, and secure installation. Here is a general guide on how to install a pivot door shower enclosure:
Gather the necessary tools and materials: You will need a drill, screwdriver, level, measuring tape, pencil, silicone sealant, screws, anchors (if required), and the pivot door shower enclosure kit, including the door, frame, and hardware.
Prepare the shower area: Ensure the shower area is clean and free of any debris. If you're replacing an existing shower enclosure, remove the old one and clean the walls thoroughly.
Measure and mark the placement: Use a measuring tape to determine the height and width for the pivot door installation. Mark the desired location of the pivot hinges on the shower walls using a pencil. Ensure the marks are level and plumb for proper alignment.
Install the pivot hinges: Following the manufacturer's instructions, position the pivot hinges on the marked locations and secure them to the shower walls using screws and anchors, if necessary. Use a level to ensure the hinges are properly aligned.
Mount the door frame: Attach the frame of the pivot door to the pivot hinges. Secure the frame to the hinges using the provided screws. Ensure the frame is level and plumb, making any necessary adjustments.
Install the door: Hang the pivot door on the hinges, ensuring it swings freely. Adjust the hinges as needed to achieve proper alignment and smooth operation of the door. Check that the door closes properly and aligns with the frame.
Secure the door and frame: Once the door is properly aligned, secure it to the frame using the provided screws. Make sure to follow the manufacturer's instructions for the specific installation requirements.
Caulk and seal: Apply silicone sealant around the edges of the door frame and where the frame meets the shower walls. This helps to create a watertight seal and prevent water leakage.
Check functionality and make adjustments: Open and close the door to test its functionality. Make any necessary adjustments to the hinges, alignment, or hardware to ensure smooth operation and a proper fit.
Clean up and finish: Clean any excess sealant or debris from the shower area. Wipe down the door and frame to remove any smudges or fingerprints.
It's important to note that these instructions provide a general overview, and the specific installation steps may vary depending on the manufacturer's instructions and the design of the pivot door shower enclosure. It is recommended to carefully read and follow the installation guidelines provided by the manufacturer for your specific product to ensure a successful installation. If you are unsure or uncomfortable with the installation process, it is advisable to seek professional assistance from a qualified installer or contractor.